Tuesday Lesson 1 Darkroom Photograms and Pinholes
Pinhole and Photograms
Today we went in the darkroom and experimented making photograms and pinhole pictures. We experimented with different exposure times to produce the best results.
- Materials
pin hole box
darkroom chemicals (developer, fixative, stopper)
enlarger
- Processes
Pinhole Method
We used the pinhole technique by taking a cardboard box with a small hole made using a pin in the front of the box which has a tape cover to control the exposure it has to light. I then take it into the darkroom to load it with the photographic paper. Then we chose a spot where we would like to take and image and open the pinhole cover to expose it to the light, we exposed it to the light for different time periods to control how much exposure the image get based on a trial and error bases. We then either put it through the machine where the image is exposed or through the chemicals to show the results. My first few pinhole images weren't successful, I struggled to get a clear image as shown below. whilst I could get results through my first pinhole experiment I experimented with increasing the time it was exposed for. I started tan exposure time of 10 seconds and ended up at 30 seconds but I still didn't get the results I had hoped for so, I later went out and reshot using the pinhole method and got much better results. Below is my first set of pinhole images which weren't successful and I was disappointed with. I later tried to manually invert through the darkroom chemicals which came out a bit darker then expected. Below are my first pinholes which weren't successful, the first was exposed for 10 seconds and the second was exposed for 20 seconds.
We used the pinhole technique by taking a cardboard box with a small hole made using a pin in the front of the box which has a tape cover to control the exposure it has to light. I then take it into the darkroom to load it with the photographic paper. Then we chose a spot where we would like to take and image and open the pinhole cover to expose it to the light, we exposed it to the light for different time periods to control how much exposure the image get based on a trial and error bases. We then either put it through the machine where the image is exposed or through the chemicals to show the results. My first few pinhole images weren't successful, I struggled to get a clear image as shown below. whilst I could get results through my first pinhole experiment I experimented with increasing the time it was exposed for. I started tan exposure time of 10 seconds and ended up at 30 seconds but I still didn't get the results I had hoped for so, I later went out and reshot using the pinhole method and got much better results. Below is my first set of pinhole images which weren't successful and I was disappointed with. I later tried to manually invert through the darkroom chemicals which came out a bit darker then expected. Below are my first pinholes which weren't successful, the first was exposed for 10 seconds and the second was exposed for 20 seconds.
These pinholes below were my second attempt with a much better outcome. The first has an exposure time of 20 seconds, which I though was slightly under exposed.
This one below has an exposure time of 30 seconds which is more exposure and more effective.
Photogram method
Photogram method
We also arranged some objects onto the darkroom paper and arranged them under the light for around 10 seconds then we put them through the chemicals for our results. the image first enters the developer for around two minutes, using tongs we remove it and put it into the stopper for around 10 seconds and onto the fixative for around a minute the the chemicals can be rinsed off in the water trough for around 5 minutes. once all of this is done we must dry the image so we can take it into the light to see our results. For the best result the objects to use are the once with let light through easily. Below are some of my photograms which I made.
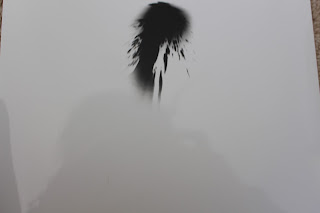
The image below I experimented hand painting the developer onto the area I wanted to get a washed effect.
- Technical skills
Below is one of my pinhole images which I tried to invert using the darkroom chemicals method. The inversion had a exposure time of 45 seconds.
Overall I think it went well, I had immediate results which i was pleased with. However at first i wasn't pleased with my pinhole images so, I reshot them to get better results.


Comments
Post a Comment