Posts

Showing posts from September, 2017

Camera-less photographer research - Willie Anne Wright Pinhole
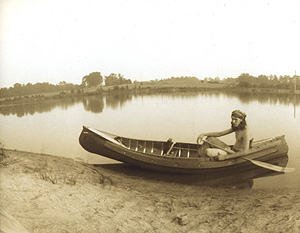
Image
Willie Anna Wright  Willie Anna Wright was born 6th June 1924, in Richmond, Virginia. She is an American photographer who is first known for her painting and later known for her pinhole photographs. Wright began as a artist, using paint and teaching classes. It wasn't until 1972 when she began more photographic art, focusing on the camera-less technique of pinhole photography. She studied at college of William & Mary and Maine Photographic workshops in New York, where one of her first assignments was to construct a pinhole camera, with many unsuccessful outcomes and few experiences in the darkroom she continued to perfect her technique. This is where everything spiralled from. Wright photographed many different subjects from landscape shots to fruit and vegetables and portraits, she also used different medias like greyscale and full colour pinhole images. In 1988 Wright went and bought a world famous Santa Barbara pinhole camera.  The process Pinhole photographs are mad

Week 3 Evaluation of Carousel Media

Image
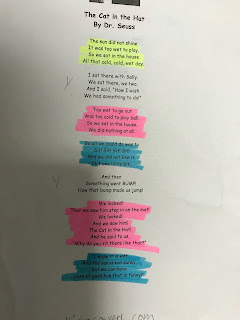
Media  Document what you did in the session on Tuesday and Wednesday (Pictures, Diary entries, Printouts ETC)  The  Our extract divided into speaking sections Brief  List under the following headings: Research that you carry out in these sessions Week 3 Evaluation of Carousel Media  Skills that you have tried, - organising the production of the advert, editing our recording on adobe audition  Any  processes   -  we used the recording studio, make and edit a audio piece. and  methods  you used. -  we put in sound effects and backing music Any  tools  that you used - the tools we used were a audio tripod, a recorder, the video studio with lighting, cameras, sounding booms and the se t. On Tuesday 27th September we recorded an extract from The Cat in the Hat by Dr. Seuss. First we split the extract up into four sections between our group of four. We then used the voice recorder to record it. It took several attempt to record the pe

Camera-less Photographer Research: Man Ray Photogram

Image
Man Ray Research Man Ray was born on the 27th August 1890 in south Pennsylvania, United States, under the name of Emmanuel Radnitzky. However preferred to be known as Man Ray. He later died 18th November 1976 in Paris at the age of 86 from a lung infection. Although he spent his career in France, he thought of himself as more of a painter then a photographer.  From a young age he showed his artistic abilities, where his bedroom because his studio. He was only educated through himself and had no art education but through art museums. Man Ray was influenced by the Armory Show and galleries of European contemporary works around the 1913's. His early work was based solely around painting the subjects of cubism. He then later moved on from painting and moved towards anti-art movement with Dada using photography. They supported each other in mechanical and photographic methods of making images combining different techniques such as camera- less photography and including his older

Shutter Speed and Aperture

Image
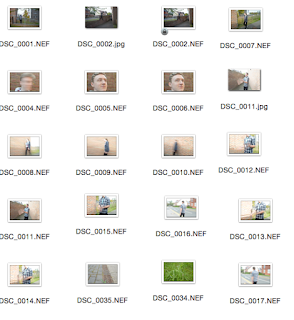
Shutter speed & Aperture  Below is a contact sheet of my shutter speed and aperture photos. From these photos I chose the best examples of each.  Shutter speed The shutter speed is how long the shutter is open for. It is recorded as a fraction of a second. It also controls how much light enters the lens as the longer it is open the more light enters. a large fraction such as, 1/1000 means the camera will capture the image quickly freezing motion. A small fraction such as, 1/4 means the shutter is slow and produces movement lines. This is often used for waterfall and sky movement photos. Today I went out and shot some images with the camera on the shutter priority mode, to experiment with a fast and a slow shutter speed. I used the slow shutter speed of 1/4 to get movement line and a less sharp image. The image below is an example of my slow shutter speed image.  the materials I used were a Nikon D3200 and some models to present an example of a fast and

How light enters the camera

Image
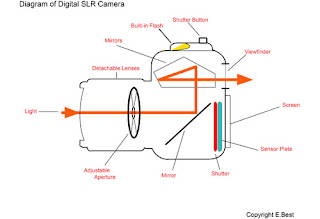
How a Camera works Light enters the camera through the barrel lens, where it goes through the adjustable aperture which controls the among of light which enters the camera. The larger the hole the more light can enter which means the F number is lower allowing the subject to be in focus and the background to be blurred. the smaller the aperture hole the higher the F number, this means less light enters the camera and the full frame is in focus. The light then hits the back mirror infont of the shutter and the sensor plate where it is reflected into the prism of mirrors in the top of the camera out through the viewfinder where the photographer can see it. When taking a image the mirror has to move for the shutter to release, this is the split second where the photographers vision goes blank.  This image shows the part of a camera. This helps us to understand how a camera works and how a photo can be developed using a camera. It explains what every part is and what it does. It

Week 2 Evaluation of Carousel Photography

Week 2 Evaluation of Carousel Photography The processes I have used this week are: importing images onto photoshop taking photos the wet process in the darkroom  using the blog such as uploading images and text. developing images through the darkroom. invention of images. pinhole cameras The materials I have used this week are: computers darkroom chemicals pinhole box darkroom paper enlarger convertor machine the paper dryer memory cards The technical skills that I have used this weeks are: using aperture to change the depth of field.  using the shutter speed to capture motion. I think I need more practise at this as we had no access to tripods which are needed. using a pinhole camera to capture images. I needed more practise as my first attempt failed, so I later went out to reshoot.  using and changing camera settings.

Darkroom Health and Safety

Darkroom Health and Safety  Do not eat or drink in the darkroom.  Always wear gloves, goggles or use tongs to ensure less harm. Make sure the darkroom contains ventilators to remove the hazardous fumes. Do not take unneeded objects to prevent any trip hazards. Keep the dry equipment away from the chemicals to prevent any spillages.  Always wash your hands with soap after they are in contact with the chemicals to prevent any irritation. Also wash and dry your hands when moving between the wet and dry areas.  Try not to spill and splash chemicals as it could cause a hazard.  Do not leave chemicals around for anyone to handle.

Tuesday Lesson 1 Darkroom Photograms and Pinholes

Image
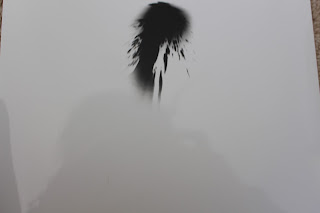
Pinhole and Photograms Today we went in the darkroom and experimented making photograms and pinhole pictures. We experimented with different exposure times to produce the best results.  Materials  photographic paper  pin hole box  darkroom chemicals (developer, fixative, stopper) enlarger  Processes  We used the photographic paper and the enlarger to produce a photogram and pinhole. Also the pinhole camera for creating pinholes photos. The darkroom chemicals were used to develop the photogram images. Pinhole Method We used the pinhole technique by taking a cardboard box with a small hole made using a pin in the front of the box which has a tape cover to control the exposure it has to light. I then take it into the darkroom to load it with the photographic paper. Then we chose a spot where we would like to take and image and open the pinhole cover to expose it to the light, we exposed it to the light for different time periods to control how much exposure th